Tuesday, January 17, 2012

Wine Glass Coasters (or regular coasters with a secret life!)

Oh my!  I've neglected this blog so!  Oh well, that's what a new grandbaby and a whole bunch of other stuff crammedintojustafewmonths will do.  But it's a new year and I'm going to try to do better.  Towards that end, here's an addictive little project that is quick and easy and uses up those fat quarters or fabric scraps you have in your stash.

Supplies:
You’ll need a 4.5” square ruler, a rotary cutter, cutting mat, and assorted fabric of your choice.


For each coaster, you will need 6 squares of fabric.  (The square ruler and the rotary cutter make it easy to cut several squares at once so you can make multiple coasters.)

Take 4 squares, fold each in half, then iron.
You should have 4 halves, and 2 squares. Layout the folded squares, overlapping one end over the next to determine the placement you’d like for your coasters.


With the remaining squares, place them wrong sides together.


Then place your folded squares, on top of the unfolded squares. 
BE SURE YOU GET THE CENTER OF THE FOLDED SQUARES AS CLOSE TOGETHER AS POSSIBLE!  Also be sure that all your fabric lines up evenly on all 4 sides.

 
Sew all the way around with a scant ¼” seam.  (I only use one pin in the center.  You may want to use more.  I’m just lazy.)

Clip the outside corners diagonally.  (Excuse the glare, but you get the idea.)


Turn the coaster inside out and if needed, poke the corners out to a point, then press flat.


Slide your wine glass in between the folds and voila, a wine glass coaster.  Or, if you are like me, you just use it as a regular coaster.  


Sunday, July 24, 2011

Knit Baby Blanket

I call this a carriage blanket because it's a little smaller than a crib blanket.  Perfect for a bassinet or carrier.

It's a simple and very easy to knit baby blanket using Bernat Baby Blanket yarn.  I used 3 skeins and size 15 needles, working in a stockinette stitch with a garter stitch edging.


Cast on 48 stitches.  Knit each row until there are 3 ridges.  Then knit 2 stitches and purl until the last 2 stitches.  Knit next row.  Repeat last two rows until blanket is about 29-30" long.  Knit last rows until there are 3 ridges.  Cast off and weave in ends.

Since the yarn is bulky, it works up quickly.  Makes a great shower gift. 

Monday, July 4, 2011

Nook 2nd Edition Sleeve Tutorial

These instructions are for the 2nd Edition Nook, the one with the touch screen. 

To make this sleeve, you will need two coordinating pieces of fabric (1/4 yard each), some fleece or felt to use as batting (1/4 yard), and some velcro. 


There are two versions shown here.  One with a flap closure (on the right) and one with a tab closure (left). 

To make the one with the flap, place the fabric together with right sides facing.  Place on top of the fleece.

Cut out the material 18" long by 7" wide.   On one end, from 3" from edge, cut a diagonal 2" in on each side. 

Sew each end using a 1/4" seam.  Turn right side out and press seams.


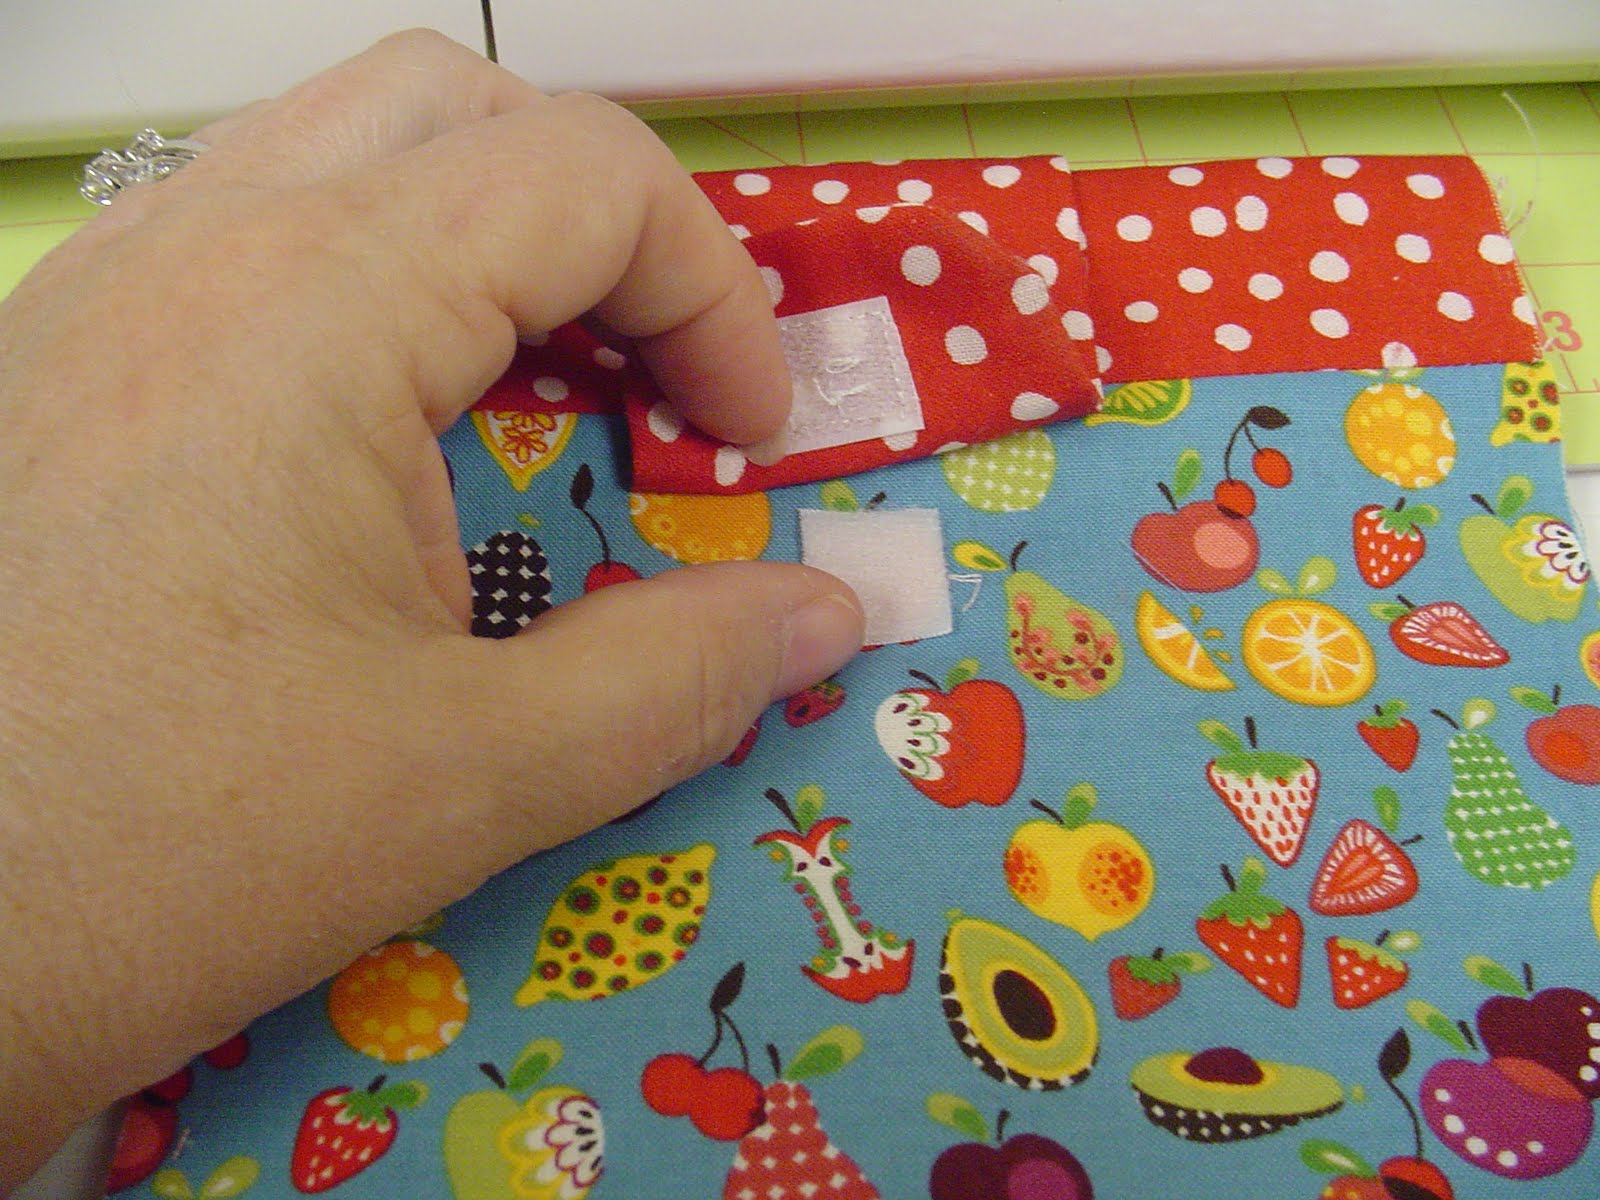
Cut a 2" piece of Velcro and sew the "hook" piece to the 'inside' of the flap.  Then fold the sleeve with the 'insides' facing ('outsides' of sleeve outside) and position the "loop" piece to the outside of the case.  (Double check position folding flap over.) 

Unfold the sleeve and sew the "loop" piece to outside of the sleeve.

Place the right sides together, leaving the flap out, and sew the sides together, using a 1/4" seam.  Turn inside out and press.  Voila!  Your Nook has new clothes!

To make the version with a tab closure, the instructions are pretty much the same except you cut the material as a 7 x 15 inch rectangle.   Cut a second piece of of material, right sides together (without the batting) 3" long x 4" wide.

Using a glass or cup as a guide, round off the ends on one side.

Sew the edges with a 1/4 seam leaving the unrounded edge open.

Cut several little snips around the rounded edge, careful not to cut the stitches.   Turn inside outside and press flat.

Cut a small square of Velcro and sew "hook" piece to the 'inside' of the tab.  Sew a button on top of the outside of the tab to hide the stitching from the Velcro. 

Place the tab right side up the two pieces of the sleeve right sides facing.  Sew the ends together. 

Turn right side out and press seams open.

Fold the sleeve in half (right sides out) and with the tab in place, position the "loop" piece of the Velcro to the outside so the tab will properly close.   Unfold the sleeve and sew the "loop" piece in place.

Place the right sides of the sleeve together and sew the sides together, using a 1/4" seam.  Turn inside out and press. Slide your Nook in it's new little home and then take yourself to some quiet place to read.  You deserve it! 

Saturday, May 21, 2011

Getting Froggy With It

Will Smith may have gotten jiggy with it but around here, we're getting 'froggy with it.'  With the anticipated birth of our first grandchild, a boy, in August, we are buying all kinds of clothes and items with little monkeys and puppies and frogs on them.  More so the frogs since my son-in-law is science teacher and likes that sort of thing.  (My daughter loves him, what can I say?) 

Here's a little blanket that took no time at all.  I found the material at JoAnn's and used about a yard.  (I did trim off some of the edges to even things up.)  This is kind of a velour microfleece plush fabric that is incredibly soft.  You can complete this project in a couple of easy steps.  Trim, Fold and Sew.

1.) TRIM up and even up the edges of the material.  The edges shed like nobody's business so after you are finished cutting, you might want to take the blanket outside and give it a good shake or two to get rid of all the little floating fuzzies.

2.)  FOLD and SEW but first, there are a couple of tricks you need to know.


 Fold the edge over just about an inch.

Use a stretch zig zag or a herringbone stitch that will both keep the edge from shedding and be decorative.  (I used a herringbone).


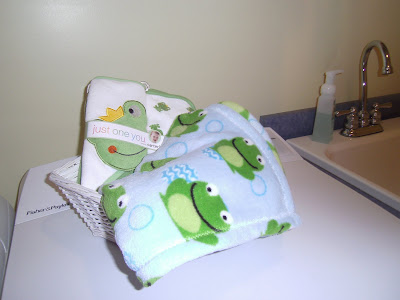
Here is the finished blanket along with the towel set I purchased to go along with it as a shower gift.

Sunday, May 15, 2011

Knit Diagonal Baby Blanket

Finished this easy and quick to knit baby afghan this afternoon.  I used 4 skeins of Red Heart Baby Clouds yarn, size 15 needles, and a free Red Heart baby blanket pattern.  I used bamboo needles although I had some trouble with the knobby texture of the yarn.  It probably would have been better to use aluminum needles but I like the feel of the bamboo. 

I bought the yarn for this project before we knew the gender of the baby.  It's white with pastel flecks but apparently the baby's daddy thought the pink showed up a bit more predominately, hence the baby blue onsie in the picture. Daddy doesn't want his boy to be confused with a girl.  That wouldn't be appropriate for the future quarterback of the Pittsburgh Steelers. 

Monday, April 11, 2011

Baby Cocoon and Matching Hat

Made the adorable little cocoon and hat for my new grandbaby using Red Heart Buttercup yarn.  The pattern is available from this link http://www.redheart.com/free-patterns/baby-cocoon

It didn't take long to crochet but the yarn is so thick, it can be a challenge to get started as you can't readily count your stitches.

But the end result is so soft and cuddly, it's well worth the initial struggle.  This is a great gift for any newborn.

(P.S.  No Teddy Bears were harmed in the posing and photographing of this picture.)

Monday, February 28, 2011

Making A Case For Readers

 Ever since I first set my eyes on some of that new self-striping yarn, I've been wanting to try it out.  But alas, I'm not that great a knitter and can't make socks so I came up with this little glass case instead.

I used Deborah Norville Serenity sock weight yarn and Size 6 needles.

Cast on 34 stitches.  Knit in stockinette stick (knit row 1, purl row 2) until piece is about 8 1/2 inches long.  Cast off and weave in ends.  

Press and block the piece.  Cut out a scrap piece of fleece the same size as the knitted piece.

Then cut about an inch off the top end of the fleece so that when the knitted piece is sewn to the fleece, there will be enough of the knitted piece on the top edge to roll.  See picture to the right. 

Place the knitted piece on top of the fleece and sew the piece to the fleece along the top using a slighter longer stitch than normal.

Fold the right sides together and leaving the top edge open, sew along the sides and bottom edges with a 1/4 inch seam.

Carefully trim the fleece from seams, being sure not to cut the knitted piece, to reduce the bulk of the seams.

Turn inside out.

Add a snazzy pair of readers and you are ready to go!